How to Factory Reset MacBook Air Without Password: A Comprehensive Guide
A factory reset is an effective troubleshooting step for solving various problems with your MacBook Air. However, what if you find yourself locked out of your MacBook Air and unable to remember the password? Fear not, as this article will guide you through the process of factory resetting your MacBook Air without requiring a password. Please note that this method will erase all data from your device, so it is very important to back up your important files beforehand. Let’s dive into the step-by-step guide to know how to factory reset MacBook air without password and regaining control of your MacBook Air.

Important Note: Factory resetting will erase all data on your MacBook Air, including personal files, settings, and applications. Make sure to back up your important data before proceeding.
Backup Your Data
Before initiating the factory reset process, it’s essential to safeguard your data by creating a backup. There are several ways to back up your MacBook Air:
Time Machine: If you have a Time Machine backup already set up, connect an external hard drive and back up your data by clicking on the Time Machine icon in the menu bar and selecting “Back Up Now.”
iCloud: Ensure that your critical files, photos, and documents are synced with iCloud. Go to “System Preferences” > “Apple ID” > “iCloud” and enable the relevant data you want to back up.
External Storage: Manually copy your important files and documents to an external storage device, such as a USB drive or an external hard disk.
Once you’ve securely backed up your data, you can proceed with the factory reset process. Sometimes the fastest and most convenient way to copy and paste on a MacBook is to use keyboard shortcuts.
Shut Down Your MacBook Air
Ensure that your MacBook Air is powered off. If it’s on, click on the Apple logo in the top-left corner of the screen and select “Shut Down.”

Enter Recovery Mode
To perform a factory reset without a password, you need to access Recovery Mode. Follow these steps:
- Turn on your MacBook Air by pressing the power button.
- Immediately press and hold the “Command” (⌘) + “R” keys together until you see the Apple logo or the spinning globe.
- Release the keys once the macOS Utilities window appears.
Erase the Hard Drive

Now that you’re in Recovery Mode, it’s time to erase the hard drive:
- In the macOS Utilities window, click on “Disk Utility” and then click “Continue.”
- Select your MacBook Air’s internal hard drive from the left-side pane (usually named “Macintosh HD” or “Macintosh SSD“).
- Click on the “Erase” button in the toolbar.
- A dialog box will appear, asking you to provide a name for the erased disk. You can leave it as the default or give it a new name.
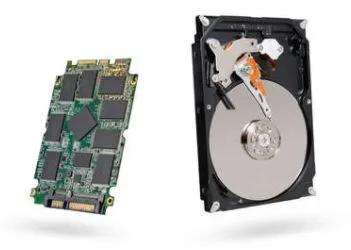
- Select the appropriate format (usually “APFS” for SSDs or “Mac OS Extended (Journaled)” for HDDs) and click “Erase.”
- A confirmation message will appear. Click “Erase” to proceed with the formatting process. This will erase all data on the disk.
Reinstall macOS
After erasing the hard drive, you need to reinstall macOS:
- Close the Disk Utility by selecting “Disk Utility” from the menu bar and choosing “Quit Disk Utility.”
- In the macOS Utilities window, click on “Reinstall macOS” and then click “Continue.”
- Follow the on-screen instructions to reinstall macOS on your MacBook Air. This process may take some time, so be patient.
Set Up Your MacBook Air
Once macOS is successfully reinstalled, your MacBook Air will restart and guide you through the initial setup process:
- Select your country and click “Continue.”
- Choose your preferred keyboard layout and click “Continue.”
- On the “Data & Privacy” screen, you have the option to transfer data from another Mac, Time Machine backup, or a startup disk. Since we are performing a factory reset, select “Don’t transfer any information now” and click “Continue.”
- Connect to a Wi-Fi network and click “Continue.”
- Agree to the macOS license agreement.
- Create a new user account by entering your full name, account name, password, and password hint. This will be your new administrator account, and you’ll use this password moving forward.
- Set up various options like Touch ID, Screen Time, and Siri according to your preferences.
Completing the Setup
Once you’ve completed the setup process, you’ll be taken to your MacBook Air’s desktop. Congratulations, you’ve successfully factory reset your MacBook Air without a password! Now you have a clean slate to start afresh or restore your important data from the backup you created earlier.
Conclusion
Factory reset is a powerful troubleshooting tool to fix various issues with your MacBook Air. While this usually requires a password, there are times when you can lock yourself out of your device. Fortunately, Recovery Mode provides a way to factory reset your MacBook Air without a password Remember to back up your important data before proceeding, as the factory reset process erases all data from your device Follow the step-by-step guide outlined in this article, and you’ll be back in control of your MacBook Air in no time. Whether you want to fix persistent problems or send your MacBook Air to a new owner, this method will help you start fresh with a clean and fresh system.
Suggested Reading:
- How to Connect Two AirPods to MacBook: Syncing Tips for an Enhanced Audio Experience
- How to Turn Off iPhone 14 : A Comprehensive Guide
- A Comprehensive Guide on How to Restart Apple Watch
- How to Unpair Your Apple Watch: A Step-by-Step Guide
- How to Reset Your Apple Watch: A Comprehensive Guide
- How to Screen Record on Android: A Step-by-Step Guide
- Android 21: Unraveling the Evolution of Google’s Mobile OS
- What Does SOS Mean on iPhone? Its Importance and How to Use It?
- How to block websites on mobile and PC ?
- 7 Best Linux Distributions for Home Users
- All about Chat GPT in its way
- Before Hackers Attack: How to protect your online accounts?

